Introduction
This guide is designed to be a ‘living document’ and will be updated/amended as and when necessary to keep the information up to date.
Dashboard
When you first sign into the control panel, the first thing you’ll see is the Dashboard.
We recommend setting up the dashboard to view the following Widgets:
- Recent Entries
- Documentation
- Toward Support
- Toward News
- Blitz
You can set up these widgets by:
- Click the gear at the top right of the dashboard and delete any unnecessary widgets.
- Click New Widget and select the widgets above to display.
You can change the settings for each widget by hovering over the block and clicking the gear that appears in the top right.
Entries
The Entries area of the control panel is where you’ll be spending most of your time when adding/editing content on the website. In Craft CMS, the word Entry is used to describe a single element of the website, whether that’s a page or a project, blog etc.
Entries are divided up into 3 different types:
- Singles
- Channels
- Structures
Singles
Singles represent one-off unique pages on the website (e.g. Home page) or Settings.
If the entry has a url you'll be able to edit the content that exists only on that page. These are pages which have no children, depend on other content on the site or have hard coded elements (such as employer login).
The Global Settings contains fields that are used across your site in multiple places, such as logo.
Channels
Channels is where you’ll find any entries that are, by default, sorted by date.
E.g. The Insights entries will be found here since, on the front end of the website, these entries are ordered from most recent to oldest.
Structures
Structures is where you’ll find any entries which have children attached to them. These entries can be sorted into a manual order. To drag an entry into a new position, simply click on the ‘4 dots’ icon, hold down the mouse button and drag the item into the new position in the stack.
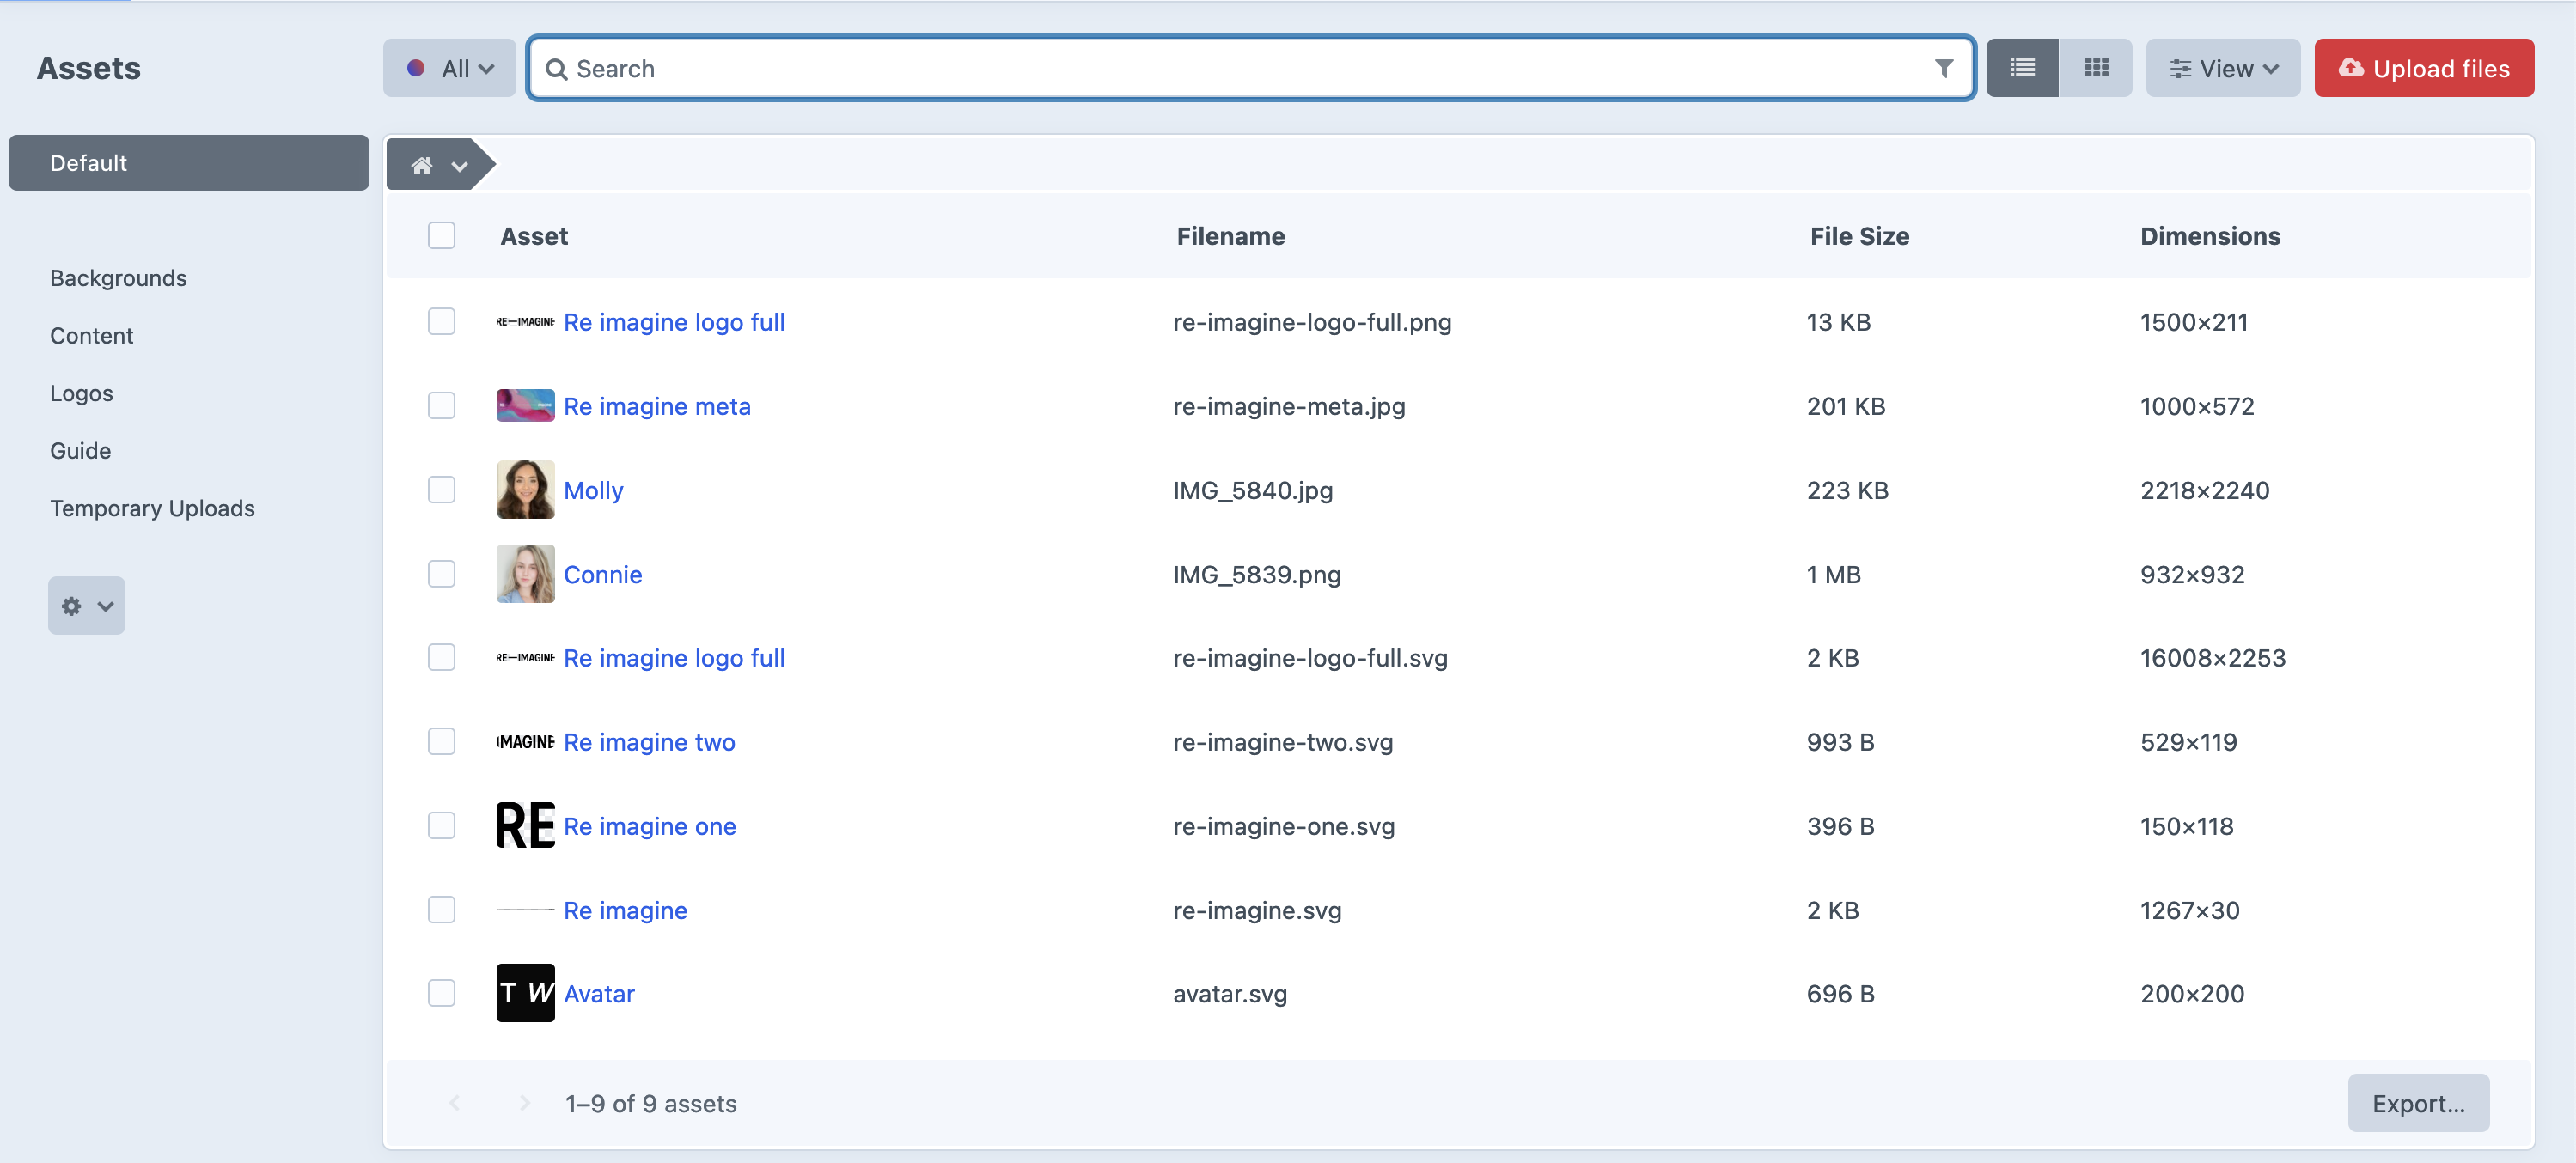
Assets
The Assets area of the control panel is where you’ll find any uploaded images, documents etc. It’s essentially a repository for all files that have been uploaded elsewhere in the control panel.
Assets can be uploaded directly from this area, but in general you’ll be uploading images/documents as and when you’re adding/editing entries. When you add an image/document to an entry, it will automatically appear in the relevant group in the Assets section.
There are also various other actions that you can use in the Assets section. If you check the box next to a specific asset and then click the ‘cog’ menu below the list, you will see a list of actions you can apply to that asset (see below).
Users
Those users that have the relevant permissions will also see a Users option in the control panel sidebar.
From here you’ll be able to add new users, edit/disable existing users, reset passwords and define what permissions a specific user has regarding which areas of the CMS they can access.
You can also add your own profile photo, and update any of your information.
Adding/Editing Entries
Clicking on Entries in the control panel sidebar will take you to a screen where you can view all the current entries on the website. The entries are broken up into different sections, which can see in the light grey secondary sidebar.
Once you are within the Entries area of the control panel, you can click on the red New entry button at the top right of the screen to create a new entry.
If you currently have All Entries or Singles selected in the secondary sidebar, clicking on the button will display a dropdown where you can choose the type of entry you want to create.
If you have one of the other entry sections selected in the secondary sidebar (e.g. Pages), then clicking on the button will take you to the relevant screen to create a new entry of that type (although you can still select one of the other entry sections by clicking the arrow icon on the button to see the dropdown options).
To edit an existing entry, simply click on its title from the list.
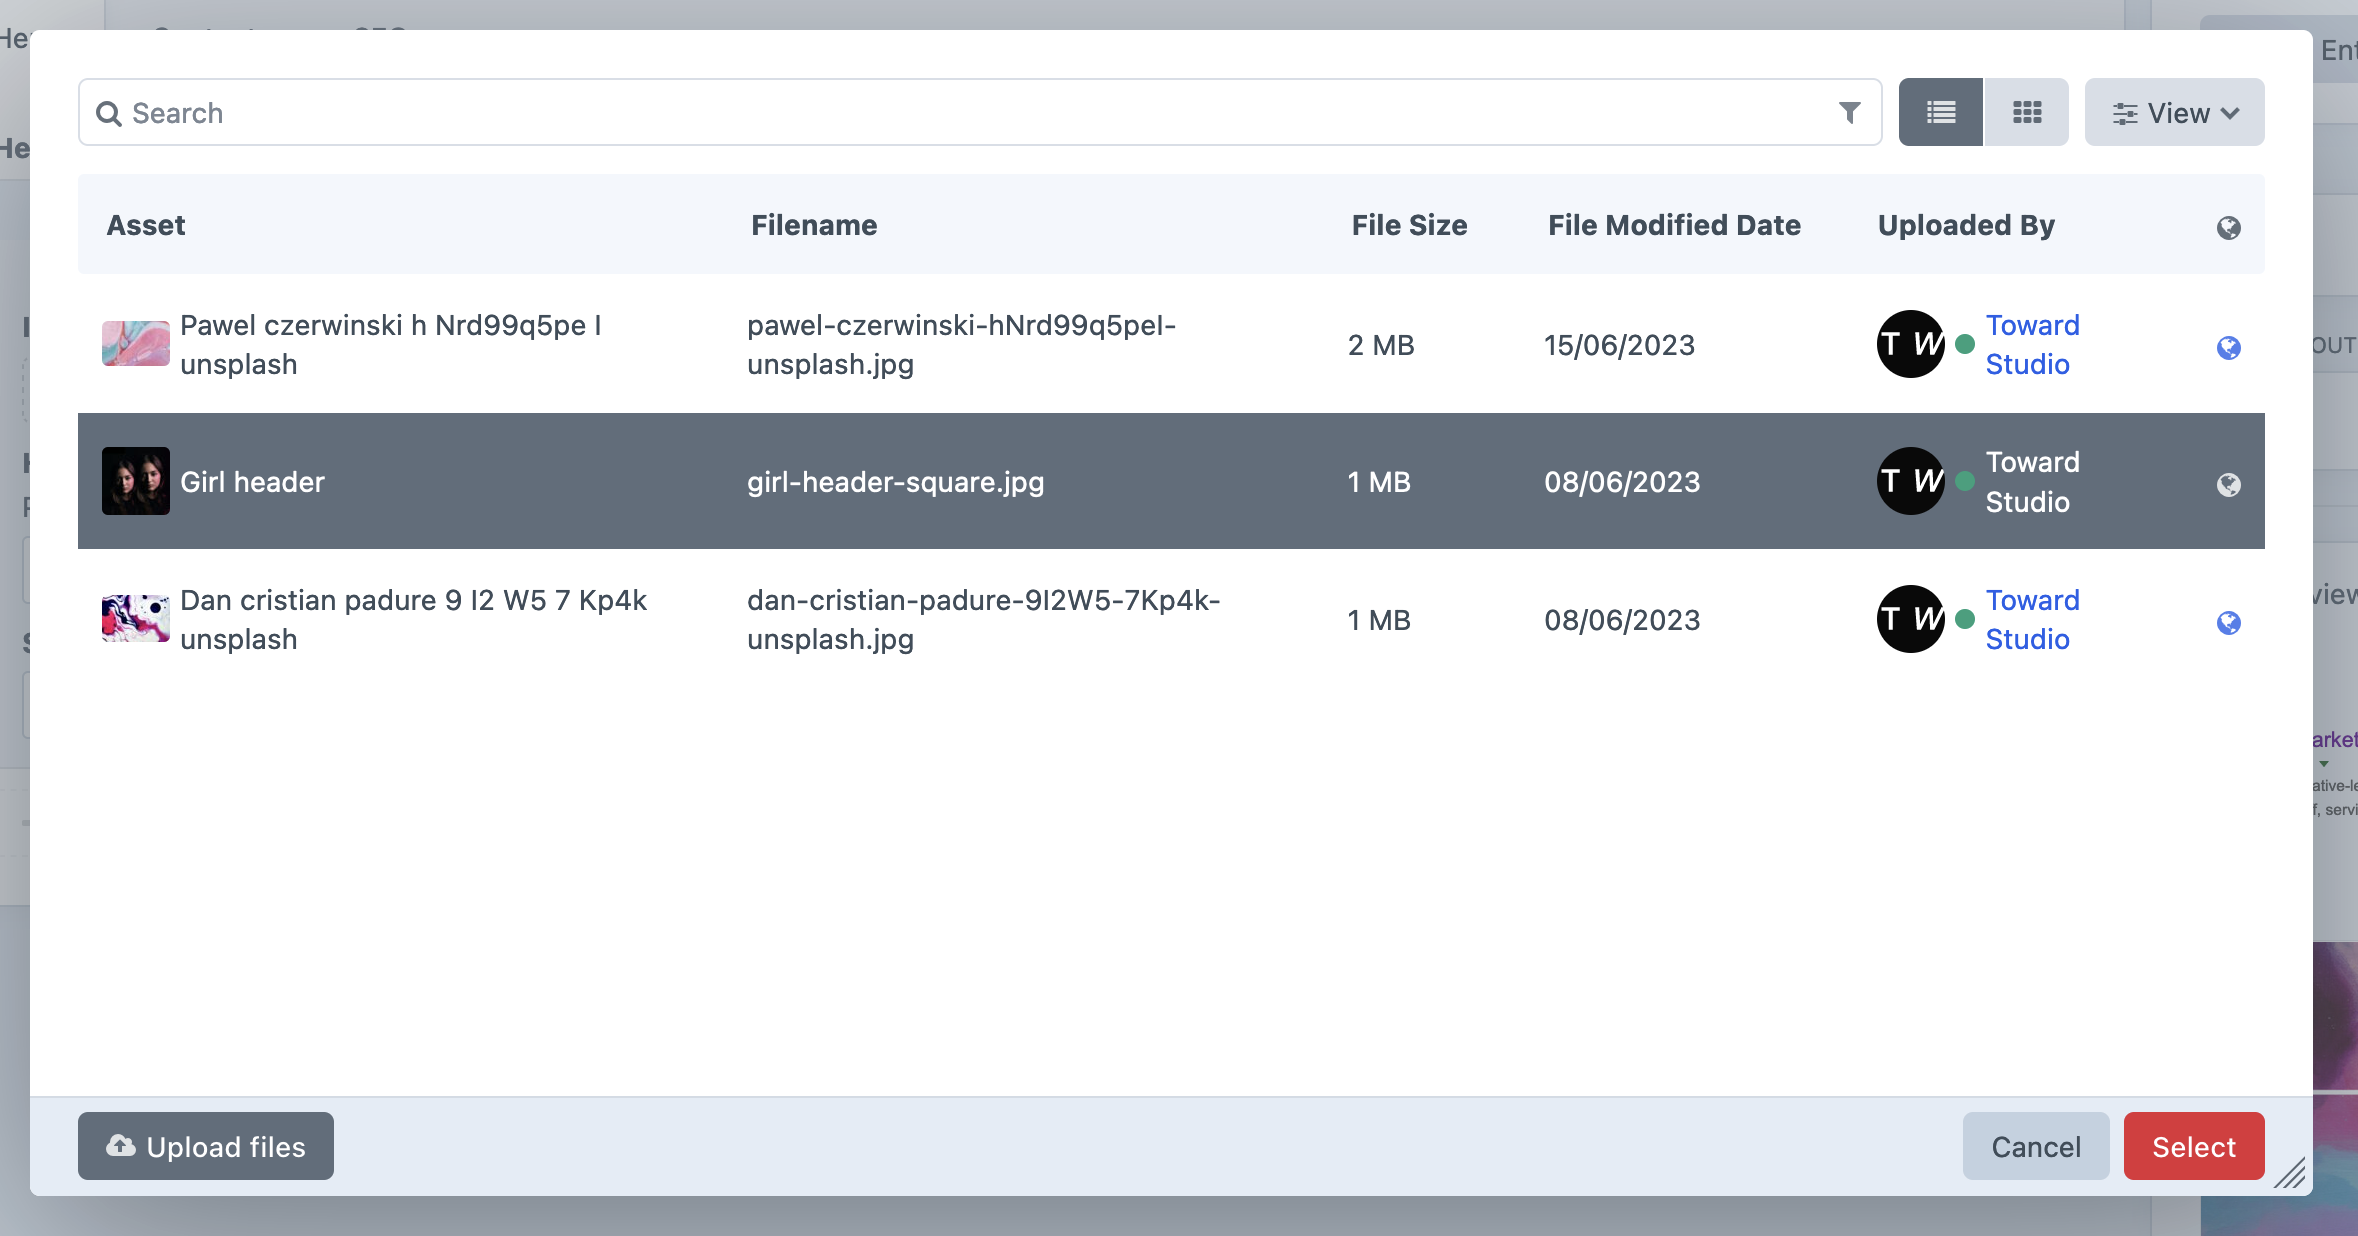
Assets Field
Assets fields allow you to upload/choose assets from the Assets area of the control panel. When you click on an Assets field, a popup window will appear displaying all the existing assets in that assets group (see image below). From this popup window you can either choose one (or more, depending on the entry type) of the existing assets, or upload a new one by clicking the grey Upload files button in the bottom left corner of the popup window.
Once you’ve chosen the relevant asset, click the red Select button at the bottom right of the popup window (see screenshot below).
A thumbnail image of the selected asset will now appear in place of the button in the Assets field. To choose a different asset, click the grey ‘cross’ icon next to the thumbnail and repeat the process.
Alt Text
When adding an image, you should also add 'Alternative Text' to help with your sites accessibility. To do this, you need to double click on the asset which will open a popup to the side of your screen.
Here you will see an Alt Text field which you can fill in with a description of each image.
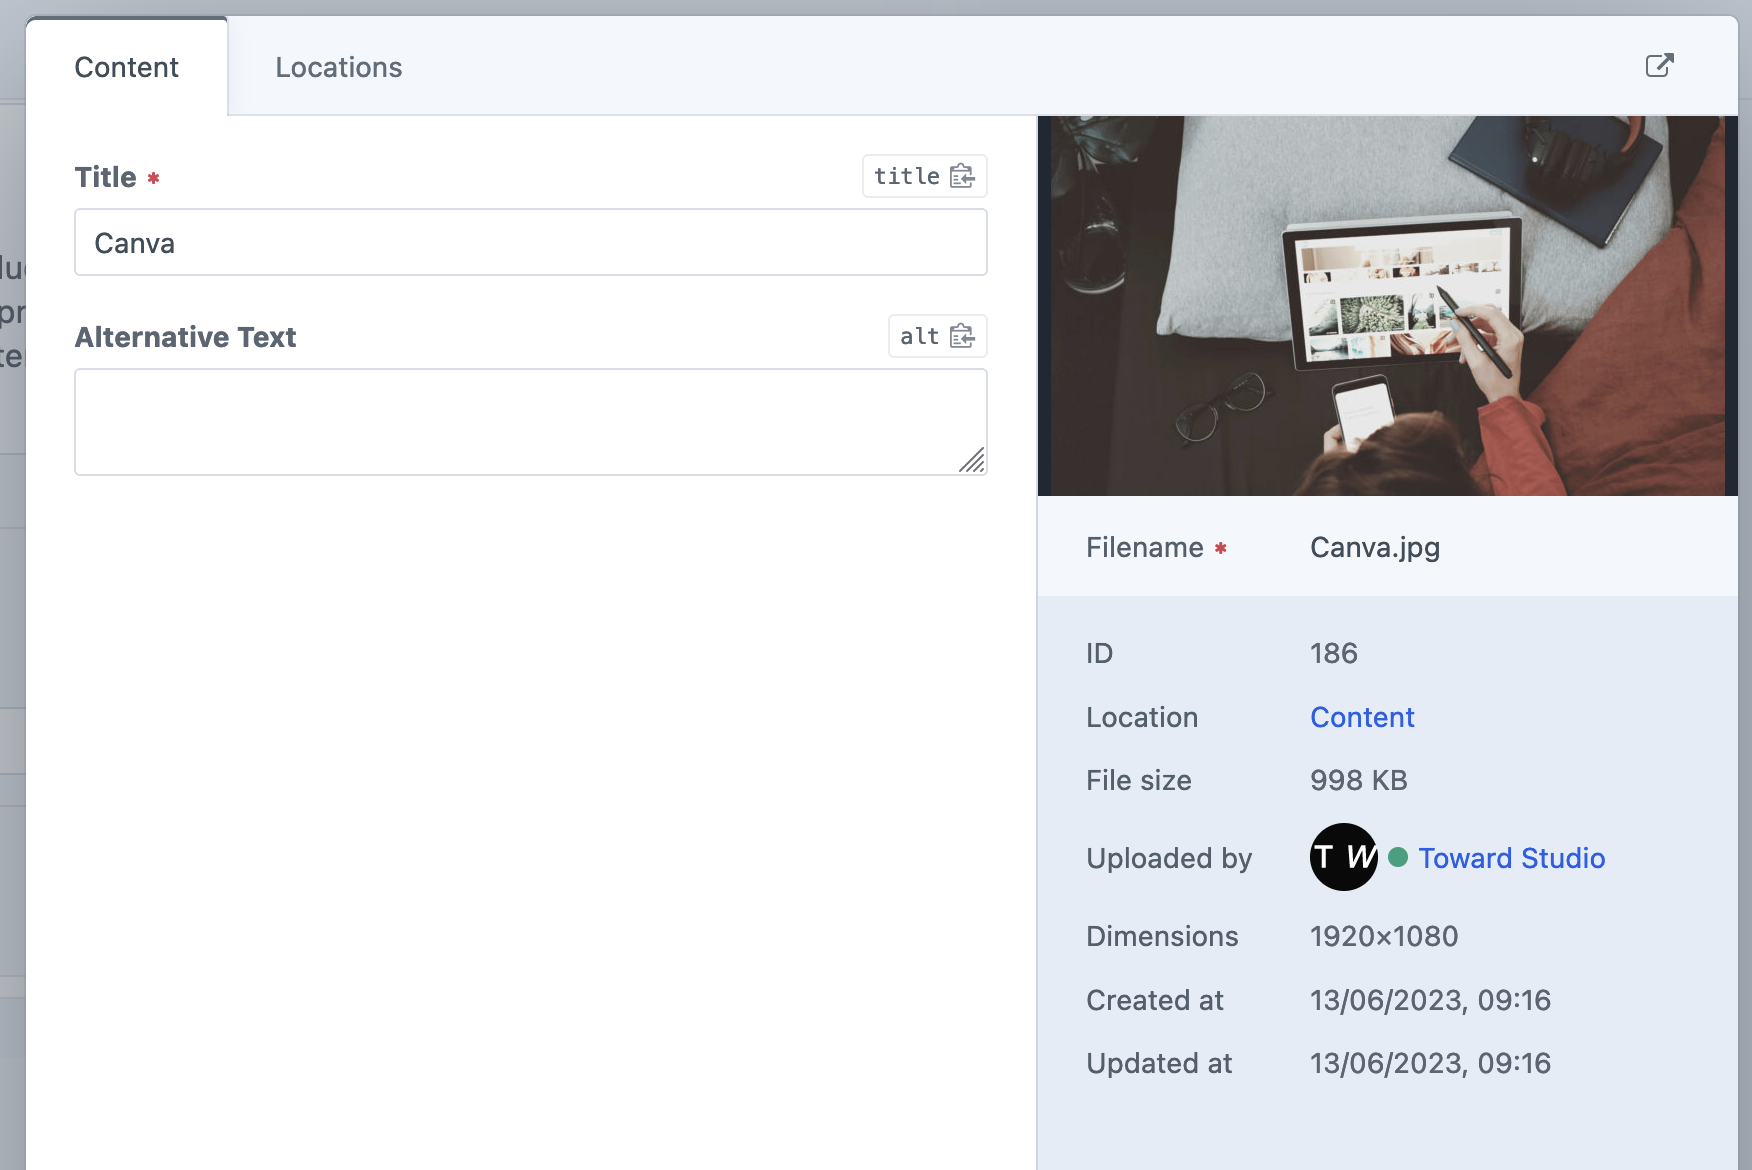
Background images will not have an alt tag as these are for decoration only.
Focal Points
Each Image can be given a focal point, which means if the image is cropped to work with the design, you can choose the centre of the crop.
To do this you need to click on the image once, and this will open a popup of the image with an Enable Focal Point button in the top right. Once clicked you will see a small circle appear on the image which you can drag to the main focal area. Once happy, you can click off from the image and save the entry to see your changes.

Scaling
When you upload an image, the website will automatically create a variety of images of different sizes from this original image. The correct size image is then displayed on the website depending on the screen size of the device. This keeps the website loading times down and ensures that the end user isn’t downloading more data than they actually need.
Entry Picker Field
The Entry Picker field allows you to choose one (or multiple, depending on the entry section) existing entries from the CMS. These fields are generally used to display other entries within that page.
Matrix Field
A Matrix field allows you to create a series of sequential ‘blocks’ that represent different content types. Each content type contains its own fields. The CMS leverages this functionality to allow the user to build up a set of content using these blocks.
To explain the benefits of using matrix fields, we'll first illustrate where other CMS’s fall down:
When adding a page, most CMS’s offer a single large field (often referred to as a WYSIWYG editor) where all the content for that page is added. There are usually buttons to alter text formatting and sizes, to insert images, videos, tables, etc.
Whilst it may seem more convenient from a user’s point of view to add all this content into one field, from a web developer’s point of view it is an absolute nightmare! Giving the user this much control over spacing/formatting almost invariably leads to content that looks messy and off-brand with the rest of the website.
Matrix fields help to eradicate this problem by breaking each type of content into its own ‘block’.
When you click on one of the available content type options, a block appears containing the relevant fields for that content type.
For example if I click on the Image type within the Insights Content matrix field, a block appears containing the following fields:
- Image (an asset field)
- Image Caption (plain text field, add a caption to display underneath the image)
Further blocks can be added by clicking the relevant content type buttons. In this way, the user builds up a set of content for the entry organised into convenient chunks, which already have the correct styles defined for them.
Blocks can be dragged into new positions by clicking on the ‘4 dots’ icon at the top right of the block.
Blocks can also be disabled or deleted by clicking the ‘cog’ icon at the top right on the block.
Landing Page Matrix
The Landing Page Matrix field is an example of a Matrix field. It gives you multiple blocks to choose from:
- Column Link List
- Column Text List
- Flow Table
- Heading & Text
- Image & Text
- Insights Collection
- Introduction
- Logo Row
- Promotional
- Quote
- Services Block
- Statistics
- Team Blocks
- Testimonials
- Text with Menu
This field is used on the Landing Entry Type in Pages, the Home Page & Case Studies.
All of the components used on different types of Matrix’s can be found in the Style Guide. This is your reference.
Insights Content Matrix
The Insights Content Matrix field is an example of a Matrix field. It gives you multiple blocks to choose from:
- Heading
- Image
- Introduction
- Quote
- Rich Text
- Video
- Promotional
This field is used on the Insights Channel.
All of the components used on different types of Matrix’s can be found in the Style Guide. This is your reference.
Common Fields
Most entries across the site have the following tabs:
Hero
Content
SEO
Hero
There are many different hero options across the site, depending on which section of the site you are on.
You can view these options in the Styleguide.
Content
This is where the main body of your content will be added.
SEO
Within this tab you can set the entries SEO.
These are what search engines will use when looking at this page.
Singles
Home
The homepage has the following tabs:
- Hero - Here you can add the Hero component.
- Content - The page content (Landing Matrix)
- SEO - Set the SEO for this page.
Global Settings
Within Global Settings you will find the following settings:
- Logo
- Site Logo - Split into two parts for responsive scaling
- Channels
- Case Study Parent Page
- Insights Parent Page
- Insights Promotional - Sits at the bottom of each insight entry
- Notification Banner
- Display Banner
- Expiry Time - How long after a user closes should the banner display again.
- Text
- GDPR Banner
- Text
- Text
- Footer
- Footer Subheading
- Footer Partners
- Footer Contact
- Copyright Text
- Footer Subheading
- Privacy Page
- Form/Emails
- GDPR Label
- Success Image
- Success Message
- Email Logo
Channel - Case Studies
The Case Studies channel is where you can add all of of your latest work.
Each entry has the following tabs & fields.
Hero
- Title
- Background Image
- Heading (Optional)
- Introduction (Optional)
Cards
- Featured Image
- Logo
- Text
- Statistic
Content
- Landing Page Matrix
SEO
- SEO Data
Channel - Insights
The Insights channel is where you can add all of of your latest updates.
Each entry has the following tabs & fields.
Hero
- Title
- Featured Image
- Category
Content
- Insights Content Matrix
SEO
- SEO Data
Structure - Pages
Within Pages you have five different entry types available:
- Landing
- Insights
- Case Studies
- Contact
- Basic Text
All of these types have different fields available.
These are:
Landing
- Hero
- Set up the page Hero
- Content
- Landing Content Matrix
- SEO
- SEO Data
Insights
- Hero
- Set up the page Hero
- Content
- Channel Selection
- Categories
- SEO
- SEO Data
Case Studies
- Hero
- Set up the page Hero
- Content
- Case Study Matrix
- SEO
- SEO Data
Contact
- Hero
- Set up the page Hero
- Content
- Contact Content Matrix
- SEO
- SEO Data
Basic Text
- Hero
- Set up the page Hero
- Content
- Basic Text Content Matrix
- Headings & Rich Text only
- Headings & Rich Text only
- Basic Text Content Matrix
- SEO
- SEO Data
Structure - Promotionals
Promotionals can be displayed across your site. To save having to re-create them constantly we’ve set these as a structure instead.
There are three entry types within Promotionals:
- Default
- Quote
- Case Study
All three provide you with different fields:
Default
- Title
- Background Image
- Heading
- Link
Quote
- Title
- Background Image
- Quote
- Logo
- Link
Case Study
- Title
- Background
- Case Study
Structure - Services
Services can be displayed across your site. To save having to re-create them constantly we’ve set these as a structure instead.
Each Services gives you the following fields:
- Services Block
- Heading
- Text
- Link
These entries can be selected within the Landing Page Matrix.
Structure - Logos
Logos can be displayed across your site. To save having to re-create them constantly we’ve set these as a structure instead.
Each Logo entry only accepts an Image. This should be a PNG or SVG only.You can then select these within the Logo Row component.
Structure - Testimonials
Testimonials can be displayed across your site. To save having to re-create them constantly we’ve set these as a structure instead.
Within each entry, you can add the following:
- Quote
- Logo
- Link
These can then be used within the Testimonials component on the Landing Page Matrix.
Structure - Insight Categories
Insight Categories can be assigned to Insights to enable the filter feature on the Insights Index.
Form Submissions
The contact form component (seen here in the style guide) is hard coded within the template.
However you can view all submissions within the CMS by going to the Form Submissions navigation item.
Navigation
You can update your site’s navigation by clicking into the Navigation option on the sidebar.
Within each menu you can do the following:
- Remove current menu items. This can be done by checking the box next to the entry and then selecting the gear at the top of the page and selecting Delete.
- Update the Menu Item. You can rearrange the order of the menu by hovering over the item and dragging it to where you’d like it to sit. You can also hover over the item and click edit. This will open a slideout in which you can update the title of the menu item, the entry/url, enable or disable it, etc.
The Menu's available are:
Main Navigation
This is main menu. This menu is limited to one level. You can only add a maximum of 7 entries/urls.
Within this menu you can do the following:
- Add New Entries / Custom Urls
Legal Navigation
This is legal menu. This menu is limited to one level, and sits at the bottom of your website.
Within this menu you can do the following:
- Add New Entries / Custom Urls
Retour
Retour is where you can manage your Redirects. It is set up to automatically create a redirect when you change the slug of a page. We have also created redirects for pages on your old site.
If you disable/delete a page you will need to manually create a redirect. To do this you can go to Retour > Redirects > New Static Redirect and add one here.
Options
- Enabled - You can choose to disable a redirect if it’s no longer needed from here.
- Sites - You can choose whether or not to create the redirect for the English or Welsh site.
- Legacy URL Pattern - This will be the Url you want to create a redirect from.
- Legacy Url Match Type - You can choose whether to redirect from a path or a full Url (includes the domain name).
- Destination Url - This will be the Url you want to redirect to.
- Match Type - You can choose whether the urls above use Regex, or they are an exact match. Mainly you will be using the Exact Match as Regex won’t be needed.
- Redirect Type - You can choose a permanent redirect (301) or a temporary redirect (302).
Incorrectly configured redirects can cause issues and may even stop people being able to access the website. If in doubt please contact us.
SEOMatic
SEOmatic is being used for your website’s SEO. This has been customised to use the SEO tab in each entry.
Within each entry/category you can customise the following:
- Meta Title
- Meta Description
- Meta Keywords
- Meta Image
- Meta Image Description
- Robots
- Canonical URL
- Twitter Card
- Facebook Card
Social Media
Your Social accounts (displayed in the footer) are contained within SEOmatic.
You can find these by going to Site Settings > Social Media.
Near the bottom of this page are the links to your social media accounts.
Tracking Scripts
Within the Dashboard you can also add tracking scripts here for the following:
- Google Gtag
- Google Tag Manager
- Facebook Pixel
- Linkedin Insight
- HubSpot
- Fathom
- Matomo
- Plausible
Documentation
Within Documentation you can see the links for the Style Guide and CMS Guide.
Blitz
Blitz is a caching tool used to help the performance of your website.
Most of the time you will not have to do anything with Blitz as it should re-cache a page when changes are made, however sometimes it does need to be flushed to display these changes.
Using the Blitz Widget on the Dashboard, you can add the URL you wish to be re-cached. It's not recommended to refresh the entire cache